-
Shop
- Adidas
- Advanced Technologies
- AI Skills Mastery 2026 Collection
- Best-Sellers
- Calvin Klein
- Car Accessories
- Confidence
- Dating & Social Skills
- Digital Resources
- AI & Technology
- AI Skills
- Beauty
- Budgeting & Saving
- Car Buying & Ownership
- Cozy Feast Collection
- Electronics & Technology
- Entrepreneurship & Business Growth
- Financial Education
- Financial Independence
- Financial Mindset & Psychology
- Goal Setting
- Hobbies
- Home Styling & Organization
- Kitchen & Recipes
- Leadership
- Mindset
- Online Business
- Parenting & Child Development
- Personal Style & Fashion
- Pet Lifestyle & Wellness
- Positive Thinking
- Sleep Improvement
- Stress Management & Relaxation
- Travel Planning
- Yoga & Fitness
- Yoga & Mind-Body Practices
- Education & Learning
- Family & Parenting
- Fashion
- Alexander McQueen
- Bags
- Bags & Wallets
- Balenciaga
- Belts
- Blazers
- Bottega Veneta
- Brunello Cucinelli
- Burberry
- Chanel
- Chloé
- Dior
- Dolce & Gabbana
- Dresses
- Etro
- Fendi
- Gucci
- Hats & Hair Accessories
- Hoodies & Sweatshirts
- Jacquemus
- Jewelry
- Jil Sander
- Keychains
- Kiton
- Luggage
- Miu Miu
- Off-White
- Prada
- Rick Owens
- Saint Laurent
- Socks & Tights
- Sweaters & Cardigans
- The Row
- Tom Ford
- Tops & Shirts
- Valentino
- Valentino Garavani
- Versace
- Vivienne Westwood
- Watches
- Furniture
- Gadgets
- Health & Beauty
- Health & Wellness
- Home & Garden
- Kids & Babies
- Kitchen
- Lighting
- Patio, Lawn & Garden
- Personal Growth
- Pet Care
- Pet Supplies
- Pets
- Shoes
- Smart Home Living Guides
- Sport & Outdoors
- Stress Relief & Relaxation
- TikTok Growth & Monetization Mastery
- Travel
- Travel & Adventure
- Wealth
- Wellness
- YouTube Shorts Best-Sellers
- Popular
- Best deals
DIY Arcade Romance Book Nook Shelf Insert With Lights
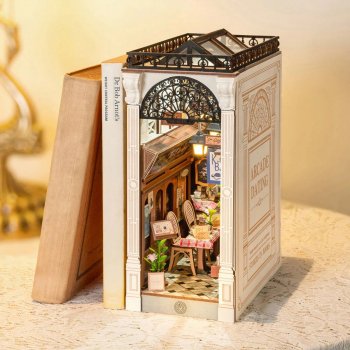
Arcade Romance Book Nook DIY Wooden Shelf Insert with Lights
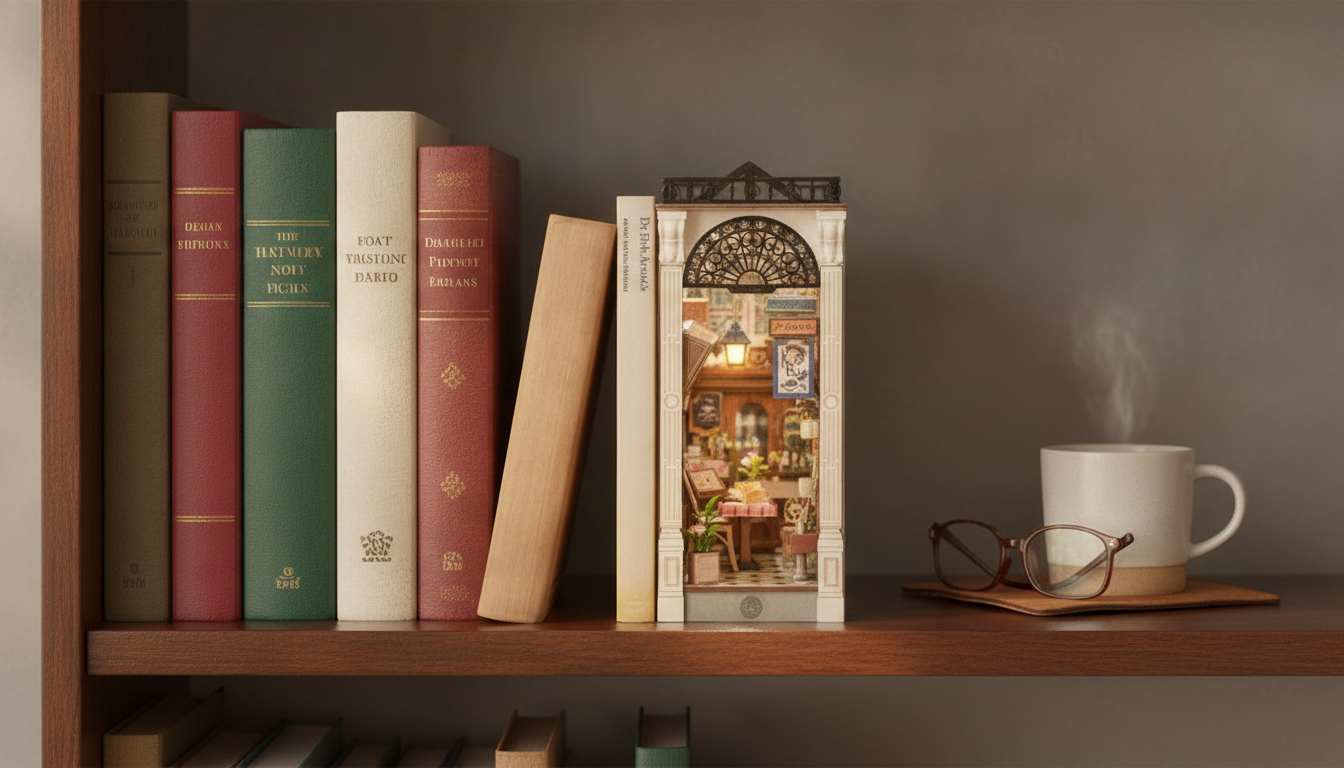
Bring a glowing, retro game-arcade scene to a bookshelf with a DIY wooden book nook that doubles as décor and a miniature craft build. The Arcade Romance Book Nook DIY Wooden Shelf Insert with Lights uses integrated lighting to create depth, highlight tiny details, and add warm ambience to reading corners, desks, and display shelves. Tucked between novels, it reads like a tiny storefront corridor—equal parts nostalgia and cozy romance—made to feel especially magical once the lights come on at night.
What It Adds to a Shelf
- Creates a mini “scene” between books that looks like a tiny storefront or corridor when viewed from the front.
- Built-in lights emphasize depth, signage, and layered elements for that night-time arcade vibe.
- A compact décor piece that fits into a bookcase while staying protected by surrounding books.
- Gift-friendly for readers, crafters, miniature lovers, and anyone building a cozy display corner.
Arcades have always been about atmosphere—dim corners, glowing marquees, and a sense of discovery. If you’re curious how that visual language became so iconic, this Smithsonian overview of arcade history is a fun, fast read: Smithsonian Magazine — A Brief History of Arcade Games.
At a Glance
- DIY wooden shelf insert designed to sit between books like a decorative divider.
- Lighting element included for a soft, glowing display effect.
- Best placed at eye level on a stable shelf for the most immersive perspective.
Quick Details
| Item | Details |
|---|---|
| Product | Arcade Romance Book Nook DIY Wooden Shelf Insert with Lights |
| Price | $64.51 USD |
| Availability | In stock |
| Primary materials | Wood (DIY kit) |
| Lighting | Included (for illuminated scene effect) |
| Placement | Bookshelf / display shelf insert |
Design Highlights
- Arcade-inspired theme with a romantic, storybook feel suited for cozy reading spaces.
- Layered construction (front-to-back depth) that makes the scene look larger than it is.
- Lighting turns the insert into a night display piece—ideal for evening ambience.
- Works as a focal point on minimalist shelves or blends into maximalist “library wall” styling.
What makes a book nook especially satisfying is the forced perspective: each layer adds another “step” deeper into the scene. In daytime it looks like a miniature set; after dark, the lighting pulls your eye to tiny details and gives the impression of being able to walk right in. If the shelf around it is fairly neutral, the glow becomes the star—like a tiny marquee in the middle of your stack.
Build Experience and Setup Tips
- Dry-fit pieces before final assembly to confirm alignment and avoid glue smudges on visible panels.
- Use a small craft clamp or painter’s tape to hold edges while adhesive sets.
- Test the lights early (before final closure) so wiring and battery placement remain accessible.
- Keep a microfiber cloth nearby to wipe dust and fingerprints as layers go in.
- After assembly, place the nook away from direct sunlight and high humidity to help preserve wood and finishes.
Lighting is the one step that’s easiest to overlook until the very end—so treat it like a “fit check” milestone. Before sealing anything up, confirm the lights turn on reliably and that any battery compartment is reachable. If the kit uses button or coin batteries, it’s worth reviewing safe handling and storage practices from the U.S. Consumer Product Safety Commission: CPSC — Button Cell and Coin Battery Safety.
Where It Looks Best
- On a bookshelf between two taller book stacks to frame the scene like a tiny theater.
- In a reading nook, office bookcase, or bedside shelf for a soft glow at night.
- As a statement piece on an entryway console bookshelf or a curated display shelf.
- Paired with warm-toned bulbs and darker shelf backdrops for maximum contrast.
Eye-level placement is the secret to that “peek inside” effect. When the nook sits too low, you lose the layered depth; when it’s closer to your natural line of sight, the perspective clicks and the scene feels dimensional. For maximum drama, place it against a darker backing (or simply a shadowed shelf) so the light reads crisp and warm instead of washed out by bright surroundings.
Care and Display Longevity
- Dust gently with a soft brush or microfiber cloth; avoid wet cloths on wood surfaces.
- If your lights are battery-powered, remove batteries for long-term storage to reduce corrosion risk.
- Avoid placing near vents, radiators, or steamy rooms to help prevent warping.
- For brighter visuals, keep the shelf background darker and reduce competing nearby light sources.
A Gift That Feels Personal
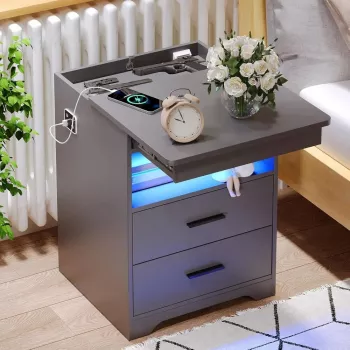
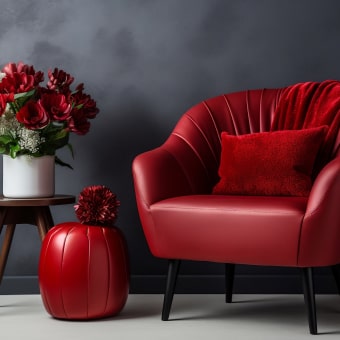
For a themed gift bundle, pair the nook with a cozy room accent that complements its playful, imaginative tone—like the Earth Design Kids Rug for a warm, whimsical floor moment in a reading corner. If the nook is going on a living-room shelf, a sturdier anchor piece can help the whole space feel intentional, such as the Solid Wood Coffee Table with Storage Drawers for added storage and a natural wood look that coordinates nicely with DIY wooden décor.
FAQ
Does the lighting come included with the book nook kit?
Yes—lighting is included with the DIY shelf insert to create the illuminated scene effect. Test the lights during assembly (before final closure) so the wiring and battery placement stay easy to access.
Where should a book nook be placed for the best effect?
Place it at eye level on a stable shelf, framed by books on both sides so it reads like a tiny “portal” between spines. Keep it away from direct sunlight and humidity, and use a darker shelf backdrop to make the glow stand out.
Is this suitable for beginners who haven’t built miniatures before?
It can be beginner-friendly with patience and a slow, step-by-step approach. Dry-fit parts first, use painter’s tape or small clamps for clean alignment, and do an early lighting check before sealing the final layers.


Leave a comment