-
Shop
- Adidas
- Advanced Technologies
- AI Skills Mastery 2026 Collection
- Best-Sellers
- Calvin Klein
- Car Accessories
- Confidence
- Dating & Social Skills
- Digital Resources
- AI & Technology
- AI Skills
- Beauty
- Budgeting & Saving
- Car Buying & Ownership
- Cozy Feast Collection
- Electronics & Technology
- Entrepreneurship & Business Growth
- Financial Education
- Financial Independence
- Financial Mindset & Psychology
- Goal Setting
- Hobbies
- Home Styling & Organization
- Kitchen & Recipes
- Leadership
- Mindset
- Online Business
- Parenting & Child Development
- Personal Style & Fashion
- Pet Lifestyle & Wellness
- Positive Thinking
- Sleep Improvement
- Stress Management & Relaxation
- Travel Planning
- Yoga & Fitness
- Yoga & Mind-Body Practices
- Education & Learning
- Family & Parenting
- Fashion
- Alexander McQueen
- Bags
- Bags & Wallets
- Balenciaga
- Belts
- Blazers
- Bottega Veneta
- Brunello Cucinelli
- Burberry
- Chanel
- Chloé
- Dior
- Dolce & Gabbana
- Dresses
- Etro
- Fendi
- Gucci
- Hats & Hair Accessories
- Hoodies & Sweatshirts
- Jacquemus
- Jewelry
- Jil Sander
- Keychains
- Kiton
- Luggage
- Miu Miu
- Off-White
- Prada
- Rick Owens
- Saint Laurent
- Socks & Tights
- Sweaters & Cardigans
- The Row
- Tom Ford
- Tops & Shirts
- Valentino
- Valentino Garavani
- Versace
- Vivienne Westwood
- Watches
- Furniture
- Gadgets
- Health & Beauty
- Health & Wellness
- Home & Garden
- Kids & Babies
- Kitchen
- Lighting
- Patio, Lawn & Garden
- Personal Growth
- Pet Care
- Pet Supplies
- Pets
- Shoes
- Smart Home Living Guides
- Sport & Outdoors
- Stress Relief & Relaxation
- TikTok Growth & Monetization Mastery
- Travel
- Travel & Adventure
- Wealth
- Wellness
- YouTube Shorts Best-Sellers
- Popular
- Best deals
Junk Drawer Organization Checklist: Declutter in 15 Minutes
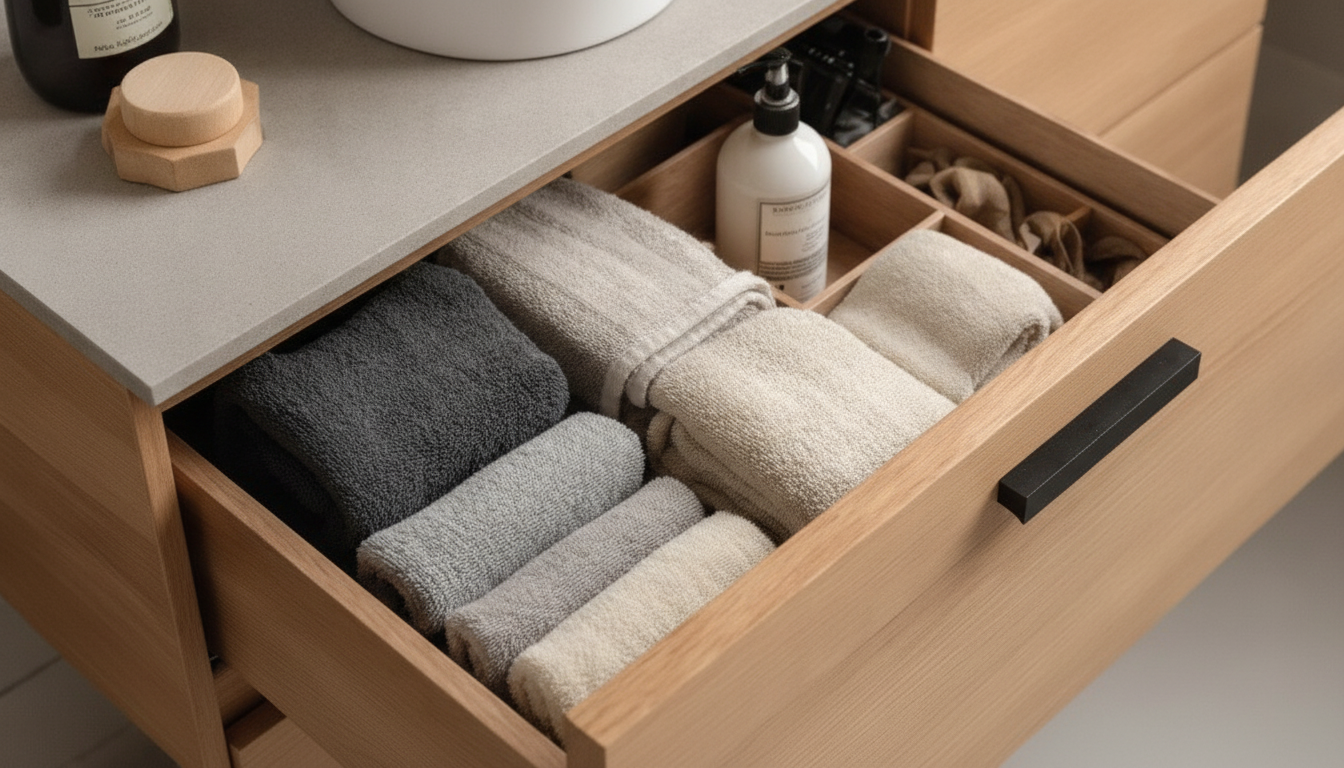
Transform a Messy Junk Drawer into a Treasure Trove with a Simple Printable Checklist
A junk drawer can be surprisingly useful—until it becomes a frustrating pile where nothing is findable. A quick reset with clear categories, simple containers, and a repeatable checklist turns the drawer into a practical “grab-and-go” station for everyday essentials. Instead of hunting for tape or a working pen, you’ll know exactly where to reach—every time. For more guidance, see How to organize drawers tips by Royal Craft Wood.
Why junk drawers get out of control (and how to stop the cycle)
Most junk drawers don’t start messy. They become messy because they’re the default landing pad for small items that don’t have an assigned home—batteries, tape, keys, takeout menus, random screws, and mystery chargers. For further reading, see Quick and Easy Drawer Organizing Projects to Declutter Your Home.
Once mixed item types pile together, the drawer creates “visual noise,” making it feel fuller than it really is. Then duplicates accumulate when you can’t find what you already own: extra scissors, multiple tape rolls, and three flashlights (two dead).
The simplest way to stop the cycle is one rule that’s easy to remember: nothing goes in without a category and a contained spot. Categories prevent chaos; containers keep categories from blending.
Set up for a fast win: tools and a 15-minute timer
Speed beats perfection here. A timer keeps decisions simple and prevents the “I’ll organize every tiny thing” spiral. Before you start, gather a few basics: a trash bag, a small donation box, and a “relocate” bin for items that belong elsewhere. Keep a microfiber cloth and mild cleaner nearby for a fast wipe-down once the drawer is empty.
Quick prep checklist
| Item | Purpose | Good alternatives |
|---|---|---|
| Trash/recycling bag | Immediate removal of packaging, broken items, expired items | Paper grocery bag |
| Relocate bin | Temporary holding for items that belong in another room | Laundry basket |
| Small containers/dividers | Create stable zones so categories don’t mix | Repurposed gift boxes, food containers (clean/dry) |
| Label tape/marker | Optional labels for repeat users in the home | Sticky notes |
If you want a simple, repeatable routine you can follow each month, use a ready-to-print organizer: Printable checklist for turning a messy drawer into a tidy, usable space.
The declutter sequence that keeps decisions easy
Start by emptying the drawer completely. This step matters because it forces a decision for every item—no “shuffling” clutter from one side to the other.
Next, do a fast trash sweep: wrappers, dried-out pens, mystery screws you’ll never identify, broken gadgets, and random packaging. Then pull out “not-a-drawer-item” objects into the relocate bin—mail, cosmetics, kids’ toys, extra cords, and anything that belongs to a specific room.
Now sort what remains into a few small piles: writing tools, batteries, adhesives, hardware, first-aid, keys, tiny tools. Finally, reduce duplicates by keeping only the best version (one reliable scissors, one good tape). If you truly need backups, store them elsewhere—so the drawer stays easy to scan.
Create categories that match real life (not perfection)
The most sustainable junk drawer is based on how items are used, not what they’re made of. Over-sorting (separate bins for every tiny subtype) looks neat for a week, then falls apart when someone’s in a hurry.
Practical junk drawer zones (mix and match)
| Zone name | What goes in it | What stays out |
|---|---|---|
| Write & Mark | 2–4 pens, marker, sticky notes | Dried pens, extra stationery sets |
| Stick & Seal | Tape, mini glue, rubber bands | Bulky rolls, half-used school glue bottles |
| Power & Light | A few batteries, small flashlight | Large battery packs, unknown loose batteries |
| Fix It Fast | Mini screwdriver, hex key, small screws in a bag | Loose sharp items, big tool kits |
| Medical Mini | A few bandages, alcohol wipes | Full first-aid kit (store elsewhere) |
| Keys & Tiny Essentials | Spare key, SIM tool, measuring tape (small) | Valuables you’ll forget about |
Containment that actually holds: dividers, trays, and micro-bins
Use the printable checklist to make it repeatable
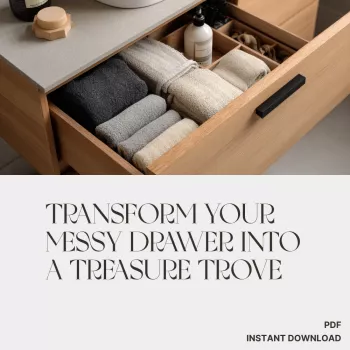
Keep the checklist where you’ll actually use it—taped inside a nearby cabinet door or saved on your phone. If you prefer a ready-made option that guides each reset step-by-step, keep this on hand: Transform Your Messy Drawer into a Treasure Trove | Printable Checklist.
Safety and cleanliness basics for a shared household drawer
Simple upgrades that keep the rest of the home organized
When a junk drawer overflows, it’s often a sign that storage is missing where clutter begins. Add a small storage hub near high-traffic zones—like a living room table that can hold remotes, chargers, manuals, and pens. A piece like a Coffee table with storage drawers for living-room essentials can reduce the urge to dump everything into the kitchen drawer.
FAQ
What should not go in a junk drawer?
Skip important documents, valuables, perishable items, loose sharp objects, and kid-hazard items like button batteries or medications. Store papers in a file spot, valuables in a secure location, and hazardous items in a child-safe, clearly labeled container or higher cabinet.
How many categories should a junk drawer have?
For most drawers, 3–6 categories is the sweet spot. If the drawer is small, go broader; if it’s large and shared, add one or two extra zones, but keep them practical so they’re easy to maintain.
How do you keep a junk drawer organized long term?
Do a weekly two-minute reset (trash out, strays relocated, bins straightened) and a monthly checklist review for supplies and duplicates. An “incoming” cup, simple labels, and limiting backups to one “best” version per item help prevent clutter from rebuilding.
Recommended for you


Plush Pet Jumpsuit Pajamas: Cozy Winter Fit & Safety
Jun 24, 2026


Leave a comment